Tuesday, September 27, 2011

Practicing

I've been asked to take some year book pictures for a teenager friend tomorrow. I am in serious doubt of my abilities in the "portrait" area! But I want them to turn out good so I practiced on my kids today :) I never managed to take pictures of Kelby on his 3rd birthday, but it's better late than never and so he was a natural choice for a ginny pig :) Turns out, he's quite a ham...

Here are some of my faves!
I have to tell you, I almost made him change out of those boots into more photo-friendly shoes. I'm so glad I didn't because this was all about the person he is right now, at age three and these photos truly capture that! He loves his overalls, his bike and those darn light-up Spiderman boots!

There was no way the girls weren't going to get their turn to ham it up! Layla was especially photogenic today!

I got some good ones of Natalie too, of course. My favorites are when she's laughing :)

Ah, taking pictures is SO much fun. It's one of those things that can snap any bad mood in two. Kinda like dancing in the kitchen and a homemade latte :)

Monday, September 26, 2011

A long overdue tutorial.

I'm pretty sure I've made somewhere in the ballpark of 50 of these blankets over the years since I made Layla's when she was 6 months old.  When I whipped up two more for baby gifts this past weekend, I thought it was about time I shared the how-to with you all here!
I know many of you could figure this out on your own, but sometimes it's nice to have the measurements and instructions done for you, right? Also, I'm trying to make this pretty beginner-friendly, so if you're more advanced, I'm not trying to insult your intelligence :)

Without further ado, you will need:

1 yard each of two different flannel fabrics.
1 yard each of 4 coordinating ribbons--I use 1 1/4" wide ribbons from Hobby Lobby


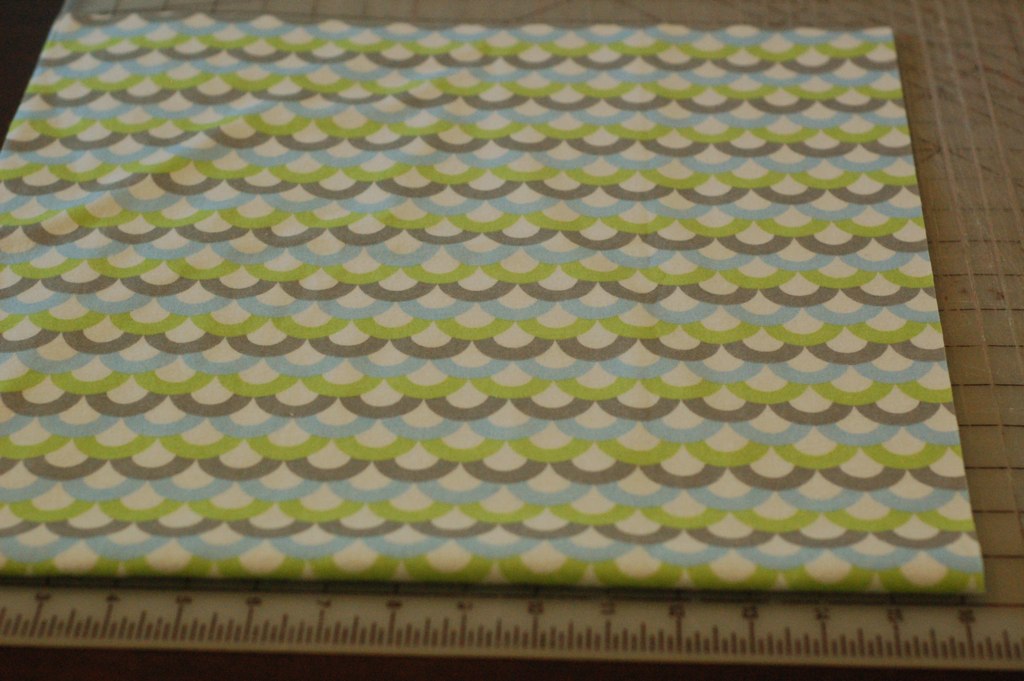
First, cut your flannel pieces to measure 33 x 33. To make this easy, I press my fabric in half and in half the other way. Then I place a folded edge on the zero line and cut at 16.5 inches. Turn it to the other folded side and do the same thing. This will make a perfect square! But, do it however ya want :)
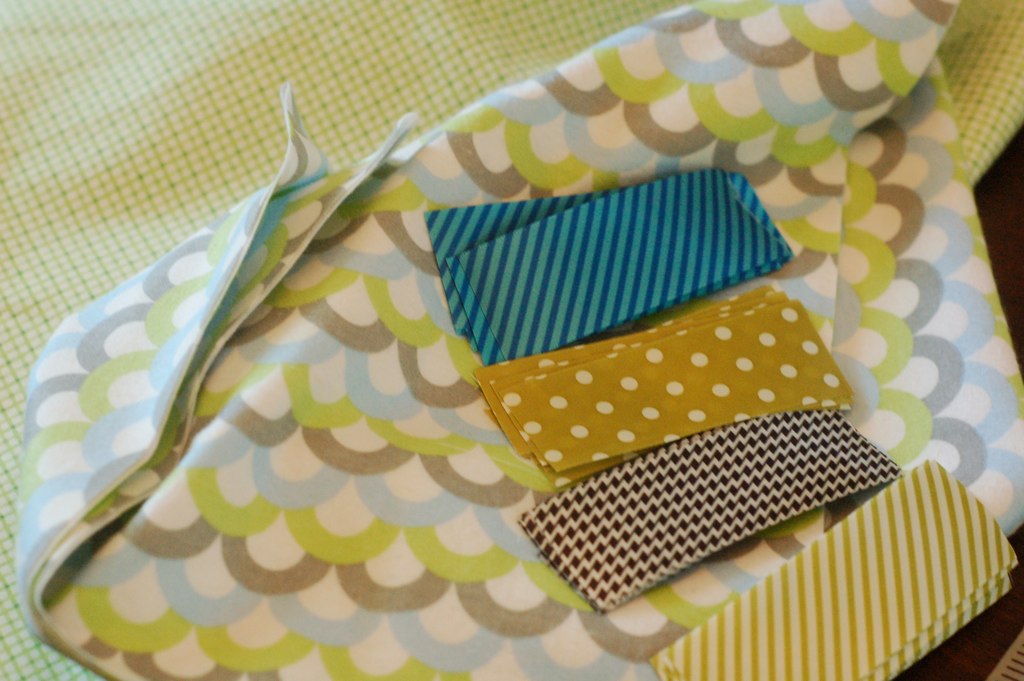
Also, cut your ribbons into 4" pieces. You'll need 8 of each. A yard makes exactly 8, so if you're worried about mess-ups, buy a little extra. Here are my ready-to-go fabrics and ribbons:
Next, we pin the ribbons to the main fabric. To start, place your ruler at the edge of your fabric and pin a ribbon (folded in half) at the 1" mark, like this:

Then, move your ruler to the right, so the pin in the middle of your ribbon is at the edge of your ruler, like this:

After that, start pinning your ribbons every four inches, centering the pin on each 4" mark. Like this:

When you get to the end, the pin in your last ribbon will be about 3 inches from the end. After that, turn your fabric and do the next side the same way. Your corner will look like this:
When they're all pinned, baste all the edges, 3/8" from the edge (I like to baste inside my seam allowance so I don't have to bother ripping out the basting later.)
Now you're ready to pin the back piece on. With right sides together, pin your main fabric to your backing fabric. (Tip--Each fabric has two stretchier sides and two that aren't so stretchy. It's helpful to pin the stretchier side of your main fabric to the stretchier side of your backing--it's just easier to sew them together nicely when the grains are the same way). Leave a 5 or 6 inch opening for turning and sew them together in a 1/2" seam.
Trim your corners like so:
Then, turn it right side out through your opening. Poke the corners gently with a chopstick, ahem, point turner ;) and press your edges nice and neat:
Don't worry about hand sewing that hole up--if you press neatly, the top stitching will take care of it.

Last step! Top stitch around the edges, about 1/8" from the edge.

Done and done!

FYI: The company, Taggies, has a patent on anything with two or more looped ribbons. Because of this, we can make these for ourselves or for gifts, but we are not allowed to sell them. If you try selling them on Etsy, you will be discovered and they will remove your listings and you will be bummed out. I know this from experience :)

Tuesday, September 20, 2011

Sew Simple

I gave Simplicity's "Sew Simple" line a try recently. I had a beautiful piece of brushed cotton (I think?) that was given to me in the last batch of fabrics from my elderly friend at church and I wanted a Fall dress out of it. I decided on Simplicity 2017 and I like how it turned out a lot...
I wore it to church on Sunday and was super comfortable the whole day! I was also able to use a vintage trim, given to me a long time ago by another elderly friend at church. I tell ya, once these ladies find out there's a young crafter/sewer in their midst, they are so generous with their stockpiles of wonderful things!!

If you want to read my review of this pattern, you can find it here.  This new Sew Simple line is pretty great in that there's only one view on each pattern and there are lots of tips geared toward beginner clothing sewers that aren't usually included in patterns. Plus, having only one view simplifies the cutting process! No searching for all the right pieces--just use them all :)

Annnndd, guess what, this line of patterns is on sale at Walmart this week for only 97 cents each! Yay! I haven't been to Walmart in ages (I live super close to a Target and let's admit it, Target's just prettier ;) but this little sale might drive me there this week!

While I was taking a picture of this dress with my self-timer, the kids just had to jump in on one and of course, they needed Daddy in it too :) If only Casey had already been in his church clothes, this totally would have worked for our Christmas cards this year! Ah, well....

Monday, September 19, 2011

fundies

Lately, my kids think the word undies is just sooooooo funny. While playing "I spy", everything suddenly has undies on it and everyone is suddenly dissolved into fits of giggles, including me, because really, it is so funny :)

A few nights ago, we were sitting around just after Casey got home from work and I grabbed a pair of Kelby's clean undies and put them on his head. Ha! Then the girls put some on their heads and great fun was had by all.


See, potty training is just hilarious! HA!

Friday, September 16, 2011

sewing, sewing, sewing

For starters, thanks for all the ideas about my military ball dress!! I'm excited to get started. Of course, this is one of the few times that Simplicity patterns aren't on sale.

It may appear that I have not sewn much lately. Although there were a few frantic first weeks of homeschooling when I thought I might as well put my machine away because I was never going to have time to sew again, I got through that and actually have managed to produce a few things :)

When it was still summery out, I picked up this plaid fabric to make this Lisette jacket out of:

 Yesterday, I saw the first few yellow leaves on my tree, so it's fitting that I finished it today!
I've made the dress on this pattern a couple of times now and love it, so it's fitting that I really love this pattern too. You can read my review on Patternreview.com here.

Beyond that, though, I have been commissioned to make two sets of crib bedding for a friend. She has fancy taste and so these are fabrics I may never have gotten to work with if not for her beautiful vision of the nursery she wants!
At first I was feeling overwhelmed (not helped by those few frantic weeks), but I decided to sew one piece a week and then use the rest of the week to work on my own personal sewing list and still finish the bedding in six weeks. Somehow that made it all much more fun :) I finished one quilt this week...
As you can imagine, these are not straightforward fabrics to work with. I had the fabrics for a couple weeks before even getting started because I had to ponder how this was going to work; the main fabric (what do you call this, picot?) almost needs gathered onto the batting. Then, to sew that onto a pretty stretchy backing (although the softest backing ever). Whew! The tricks I came up with worked amazingly!! I'd be happy to share IF anyone cares or plans on using this fabric someday :) I have some ideas for the bumper pads next!

Thursday, September 15, 2011

formal gowns? anyone?

I decided a few months ago, I am going to attempt sewing my military ball gown this year. The ball is every November and last year, it was difficult to find many choices at that time of year. I got a great black dress that fit really well, but this year I want to make something fabulous instead! I've been perusing patterns online for months now and have determined that it's the fabric choice that matters maybe more than the pattern.

This one is a major contender:
I like the white version, the one on the model, but what is the trim on there?? I know this is a style that I could easily pull off and would be comfortable sitting for several hours (because that's what you do at these things. How they're allowed to call them "balls", I will never know!)

Slightly more risky, but another that I'm seriously considering is this one:

I say more risky, because I really don't know how this style will look on me, with the gathering at the side. I really like the view on the top left. Come to think of it, actually, it's possible my gown from last year had those side gathers. Hmmm, I'll have to go check it out.

Okay, until a few days ago, I was almost sure I was going this route:
Obviously, this is not a formal gown, but I would adapt it to be floor length (I noticed short is a kind of unspoken no-no for this event) and in a formal fabric, I think it would work and could be really great. The little satin belt makes me happy and I know this would flatter me just fine. I went ahead and picked up this pattern last week when Vogue went on sale for 3.99.

BUT, a few nights ago, while watching How I Met Your Mother, with Casey, I shouted "Oh, my goodness, Casey, look what Robin's wearing!" He had no idea what I was going on about, but check this out!
This is the dress! However, I am not lovin' the fit of the bodice here at all--look how it's pulling at the waist and it's also way too low cut for me to feel comfortable. Not at all how it looks on the pattern envelope. So, now I'm having second thoughts. I do already have the pattern and I'm sure I can dig up some fabric to make a muslin, so I might as well just see.

I'm rather surprised that I can't seem to find many photos or reviews of formal gown patterns. I guess I'll be pioneering :)

In any case, what would YOU do????

Monday, September 12, 2011

Chalkboard paint

I bought a huge frame at a garage sale last summer and finally, before we started our current school year, got around to giving it new life as a chalkboard! Whenever Casey and I undertake a new house project, big or small, we tend to bounce a LOT of ideas around before jumping in. In this case, we decided to buy a piece of plywood, have it cut the right size, paint it, then screw it right into the wall, screwing the frame on over it. I didn't want it hung like a regular picture because I need it to stay put while in use! Here's how it turned out:
So, now that I've used the stuff, here are my tips for successfully using chalkboard paint:

  • Buy the roll-on kind. I tried the spray paint first and even though I primed my wood first, I had a hard time getting an even coverage. I used the whole can over several coats and it still looked spotty. Plus, it didn't erase at all.
  • Let it cure for 3 or 4 DAYS! Don't use it at all until it's been that long! 
  • Before using it, rub a piece of sideways chalk all over it in a circular motion, so it gets in all the tiny cracks. Then, rub that in with your eraser, also in a circular motion. After that, wipe down with a warm rag and you're good to go! 
  • Don't use colored chalk! It does not wipe off. The white chalk comes off fine with a wet rag, but the colored stuff stays. 
Although not the same as a real chalkboard, this is working for me! Just don't expect it to erase very well with just the eraser. Every couple days, I just take the wet rag to it and it looks like new :)

Thursday, September 8, 2011

Brilliant!

Now that we are getting into the swing of things, I am finding a few tricks that work for my homeschooling organization. I read this idea somewhere and it is brilliant, so I had to share. For awhile, I kept the books and things that we used daily during circle time in a little plastic tub. The tub would start with us in the living room for circle time, move to the table for school work, then maybe to the kitchen if I read out loud during lunch. But, the books just kinda get piled up in there and I got tired of digging through books. The solution? A dish drainer!!
It is segmented perfectly for books, so I can flip through them so easily. Plus, the silverware caddy is convenient for the smaller things we use daily during circle time.

Now, I gave you a good idea, so it's your turn :)  Will you be my sounding board for a sec??

First off, I cannot believe how busy I feel now that school is in full swing. I feel like I never sit down!! There is so much that needs done and school only adds to the home maintenance! I have only sewn one seam in an entire week, which kinda bums me out, but obviously those expectations need to change too. A few things I'm working on to improve things where housework is concerned:

  1. Lowering my standard. A family that is home all day cannot have the same standard of "tidy" as a family who works and goes to school. We are here all the time, so I need to be ok with some degree of mess.
  2. I have not required enough of the kids. I'm working on this. The little things they are capable of doing could really add up and help me out a lot. I'm wondering, though; do you have any tips for motivating your kids to help out with a good attitude?
  3. There are a few things I feel like I have under control. One is the laundry, the other is the kitchen. I think if I can maintain these two areas, plus have the family room generally picked up by the end of the night, I'll be happy with that.  
What are YOUR tricks for keeping up????? Please, I really want to know!!


Tuesday, September 6, 2011

Ode to Colorado

Every time I leave the city and enter the nearby more mountainous parts of my lovely state, I am always so in awe of God's wonders. He didn't have to make everything so beautiful, ya know, but aren't we glad He did? It always reminds me that our creative desires and love for beauty is a result of being created in His very image.

We escaped home and spent the night with Casey's parents in Colorado City last weekend. While there we witnessed a sideways-blowing crazy rain storm, which resulted in this amazing rainbow!
Amazing!
I can never get enough of the views from their yard down there, even though it seems the camera never quite captures it like real life!

8 grandkids on this side of the fam. 5 boys, 3 girls. These are the girls :)
Love this one of Natalie!
It occurred to us recently that we have never taken the kids to Bishop's Castle, which is only minutes from my in-laws house.  This place is the result of one guy and his father before him, I think, over several decades. It's crazy and ridiculous and awe-inspiring and a death-trap all rolled into one :)
Natalie and Kelby were FEARLESS! It was freaking me out. This is NOT a safe place. Layla, on the other hand was absolutely terrified. In her defense, I was not thrilled about the initial super-steep staircase either ;)
Can you see it in her face?? hahaha!
While I'm on Colorado and its merits, love this oldie from good ol' Five Iron Frenzy:

It's true, ya know :)